• Skip to primary navigation
  • Skip to main content
  • Skip to primary sidebar
  • Skip to footer

Bob Easton

Chocolate powered woodworking

  • Home
  • Grinling Gibbons Tour

Middle Planks Hung

April 28, 2009 by Bob Easton 2 Comments

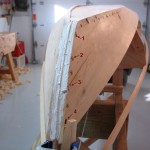
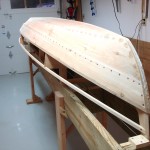
mid planks donelap bevelThese went a lot faster than the garboard planks. No steam bending needed. There was a lot less white goop too; the dog walking down the street escaped with no goop this time.

A couple of details are interesting. Lapstrake planks overlap at the edges. The “lap” on this boat is 5/8 inch and is, like the edge of the boat’s bottom, a rolling bevel. Getting the bevel right is pretty easy with the use of a temporary batten (that really thin piece) which simulates the edge of the next plank. Then stand a simple lap gauge between the batten and the existing plank to find the bevel angle. Plane along the bevel using the gauge to check for the right rolling angle. Keep the lap flat and free of crowns and all will fit well.
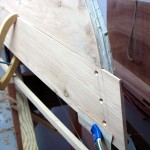
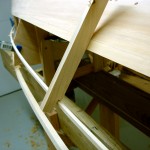
gainsThat is, until we get to the ends of the boat. There’s no overlapping at the ends. So, as we approach the ends, we plane a rabbet into the lap area of the garboard planks, and into the matching area on the middle planks. If one gets this rabbet to be half the plank’s thickness at the end of each plank, the result is nice and smooth at the stems. This area of transition is called “gains.” No, I don’t know the origin or reason for the term. My gains turned out fairly well.

Fastening is with a few screws in the stem, adhesive caulk (3M 5200) at the stems and in the rabbets, and clinch nails every 2 inches.
Filed Under: Boatbuilding, Eva Won, Fiddlehead

Tools…

April 23, 2009 by Bob Easton 6 Comments

My slow and deliberate boatbuilding adventure is slow not only from forgetting to order the right fasteners, but also stopping to make tools as I need them.

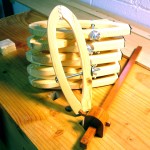
clamps-and-gauge1Lapstrake planking is the sort where one plank overLAPS the next. Two tools useful for this kind of construction. First, one needs to mark the width of the lap on a plank edge so that yet another rolling bevel can be planed as a joint area. Some boatbuilder make simple little gauges from a notched piece of wood. That’s basically a one-time use gauge. I decided to make a good marking gauge that will last the rest of my woodworking days. It’s in the foreground of the photo. (Click any picture to see a larger version.) It is made of cherry with a couple of coats of wiping varnish as finish.

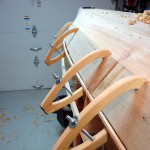
clamps in useNext comes the clamps. Deep throats are needed to reach around the width of the planks, deeper than most c-clamps. These are traditional lapstrake clamps, cut from pine and poplar stock that was already on hand. The hinges are nylon belt webbing and the tip pads are rubber drawer lining material. Finish is 2 coats of boiled linseed oil thinned with mineral spirits. Yes, they are very lightweight, yet are strong enough for this lightweight planking.

The wood that’s clamped to the boat is not a new plank. It is a spiling batten, 1/8 inch thick plywood. Spiling is the measurement process used to discover the shape of the next plank. Measures are taken from the lap line on the garboard plank above and from a thin temporary batten that marks the edge of the next plank.

Filed Under: Boatbuilding, Eva Won, Fiddlehead, Hand tools, Shopmade

Garboards Hung – A Cracking Success

April 18, 2009 by Bob Easton Leave a Comment

Dan in the black cap. Greg in the blue cap.
Dan in the black cap. Greg in the blue cap, demonstrating something on the Whitehall.

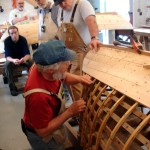
“Doc” Dan and I were hanging a plank on a Whitehall boat last spring. It was one of the planks at the turn of the bilge, a part of the boat with difficult curves in all directions. Dan and I had a beautifully spiled plank, a perfect fit.  Yet, it took a good bit of clamping to keep it where it belonged while we screwed it down. When clamping a plank, it is very common to hear little cracks and squeaks as the plank rubs against any of the 24 frames of the boat. A much louder CRACK sounded as we tightened the 5th or 6th clamp. Dan and I stared at each other in wide eyed surprise. Then we examined the plank and found no cracks or splits. Our uninvited sound had come from a frame that cracked. It’s relatively easy to replace the plank (just a few hours of spiling and shaping), but much harder to replace a frame. Sigh! Our master shipwright, Greg,  shook his had sadly and then gave instruction on how we could make a repair with epoxy.

garboard crackThe sinking feeling of an unexpected CRACK happened again with one of the Fiddlehead’s garboard planks. The last time I posted was after steaming the planks and temporarily fastening them. The next step was to remove them, apply an adhesive, and permanently fasten them. The stem of each plank was held by 4 screws. I set about removing all the temporary screws, not thinking much about the tension that might still be in the twisted wood. I removed them in the sequence shown in the picture (click the picture for a larger version). As screw #3 was removed, with #4 still attached, the plank cracked.

I sat in the moaning chair and diagnosed the failure as having two causes. The most obvious was removing the screws in the wrong sequence. The other was getting ahead in the sequence of things. The planks were originally left a couple inches long on each end. I trimmed off the excess after initial fitting. Had I left the excess, there would have been more meat around the screw holes and less probability of splitting.

The repair is a gap filling mix of epoxy and two additional screws. I think it is sufficient, but might add some additional patching on the inside later.

The white stuff is 3M 5200 adhesive. It is very much like construction adhesive, but is “Marine” grade which justifies at least tripling the price. It is very sticky stuff and gets all over everything. The stickiness lasts for days, as it takes 7 days to cure completely. It migrates so insidiously that some got onto a dog that was walking down the street, 50 yards away from the shop.

Filed Under: Boatbuilding, Eva Won, Fiddlehead

  • « Go to Previous Page
  • Page 1
  • Interim pages omitted …
  • Page 93
  • Page 94
  • Page 95
  • Page 96
  • Page 97
  • Interim pages omitted …
  • Page 128
  • Go to Next Page »

Primary Sidebar

Footer

Recent Posts

  • New Frame Saw / Scroll Saw
  • Lamppost Sign
  • Goodbye PayPal – Goodbye Bob’s eBooks
  • Anarchist’s Workbench is Done
  • Why we keep offcuts…

Categories

  • About
  • Artwork
  • Boatbuilding
  • Boating
  • bowl carving
  • Boxmaking
  • Clocks
  • Drawings
  • eBook
  • etude
  • Eva Too
  • Eva Won
  • Fiddlehead
  • Fiddlehead model
  • Flying
  • frame saw
  • gilding
  • green woodworking
  • Grinling Gibbons
  • Guns
  • Hand tools
  • Humor
  • kerfing plane
  • Lettercarving
  • Mill Creek 13
  • Model building
  • Power tools
  • Rant
  • resawing
  • scroll saw
  • Shopmade
  • sign painting
  • Stonework
  • Swimming
  • Technology
  • The Wall
  • treadle lathe
  • Uncategorized
  • VSD
  • Woodcarving
  • Woodturning
  • Woodworking
  • workbench

Other stuff

  • About
  • Contact
  • Privacy Policy

Copyright ©2024 · Bob Easton · All Rights Reserved